
I have been wanting to do this for a really long time. I was first introduced the idea of a "Mood Board" through fellow blogger, San Smith. She has a lovely blog that is about her life as an illustrator, her art, and the importance of surrounding yourself with inspiration. Her post led to another lovely blogger, Anna Denise, who wrote and amazing article on how to make a Mood Board. Oh gosh! I am so glad I read this little gem of the internet! I've been following Anna's blog and sketchbook scans for a few months and everything is beautiful. Its no wonder she's so creative! She always has something refer to for inspiration!
I like the idea of having a Mood Board, but I never really liked cork boards. In my opinion they look bulky and also they make me feel too rigid. They always remind me of being in grammar school where discipline was harsh. I'm suddenly in a time warp where I'm sitting in an uncomfortable wooden desk and constantly looking at a clock. I didn't want my Mood Board to make me feel restricted. Luckily I found some DIY tutorials on how to make a French Memo board. Its a beautiful alternative. I just finished making my own DIY French Memo board and in this post I'll show you step-by-step on how I made mine.
Things you will need:
-A framed canvas
-quilted batting (optional)
-pretty fabric
-lots of ribbon
-staple gun
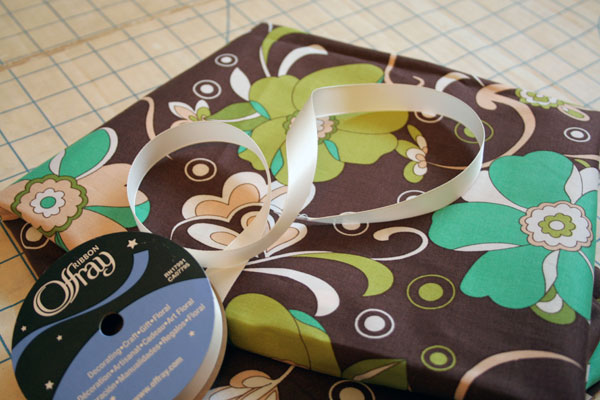
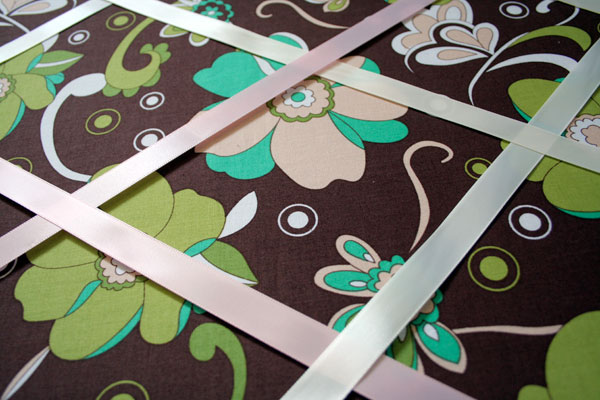
This is the fabric I will be using to cover my French Memo board. I got it at the fabric warehouse for $2.50 for half of a yard. To hold my photos/memos/scraps, I am using satin ribbon. You can use whatever fabric you like and mix and match the colors too :)
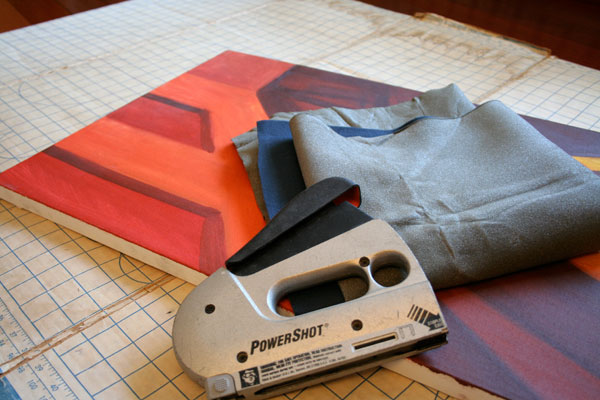
This is all the hardware I'm using. I'm actually using some recycled materials for this project. I have an old painting that I made a long time ago that I never really liked. I don't have quilted batting, instead I found some foam-rubbery scrap fabric that I will use to pad the inside. I've seen lots of DIY tutorials on how to make a French Memo Board but none of them explain why they need to be padded. I think its just to hold the pretty fabric in place. Also, you'll need a very strong stapler. I'm using a Powershot staple gun. You have to be careful when using power tools. This staple gun is so powerful, it can probably take down a deer. So watch your fingers and toes!
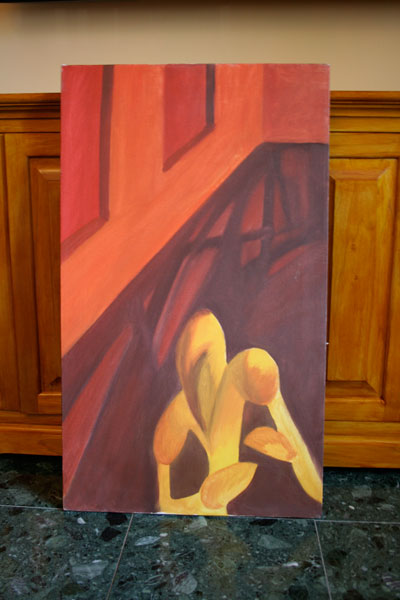
This is what the original painting looks like. It measures 17"x28". Bleah! I made this for a color study project. I was never happy with it and its also in a weird size. This painting has been haunting me forever. I only took a photo because I will never see this again. hahaha!
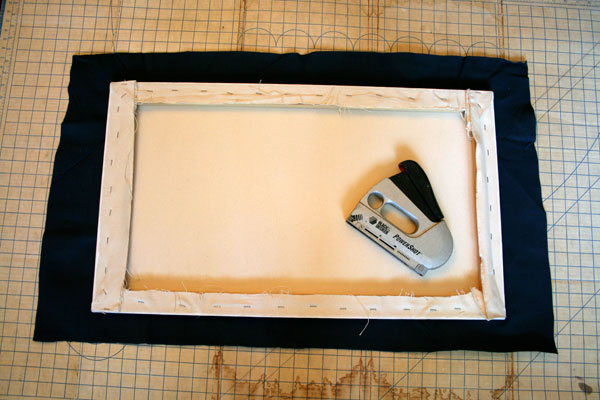
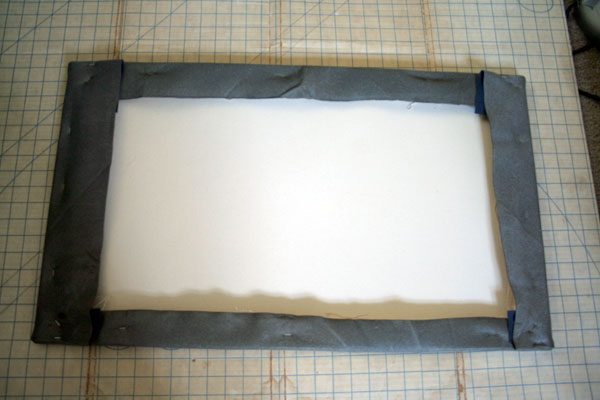
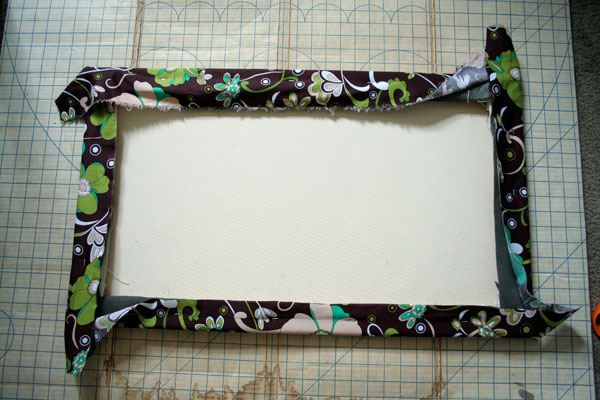
I laid the painting face down onto the foam-rubber scrap fabric. I'm lucky that the scrap was just the right size! It seems that this piece of fabric was destined for this project! What I'm about to do is cover the canvas with this fabric. Its almost like stretching a canvas.

Staple the top and the sides with even tension. Make sure its tight but not too tight. You don't want it to be loose either. And leave the corners alone because I'm about to show you how to secure it neatly.

If there was one thing that I could be proud about art school, is that they showed me how to stretch a good canvas! This is what a neat corner is supposed to look like. Even after many years my canvas hasn't loosened, stretched, or warped! Now I'm about to show you how to make your corners neat like this.
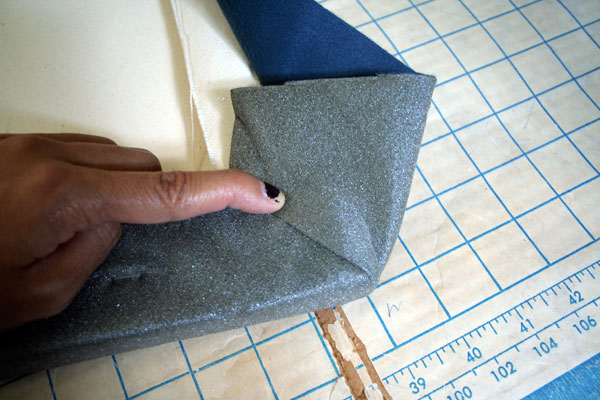
First pinch the edge of the fabric, then lay it down against the frame. The fold should be at a 45 degree angle.
Staple it in place
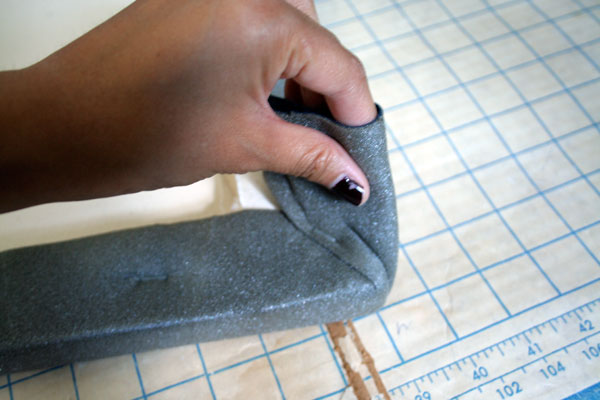
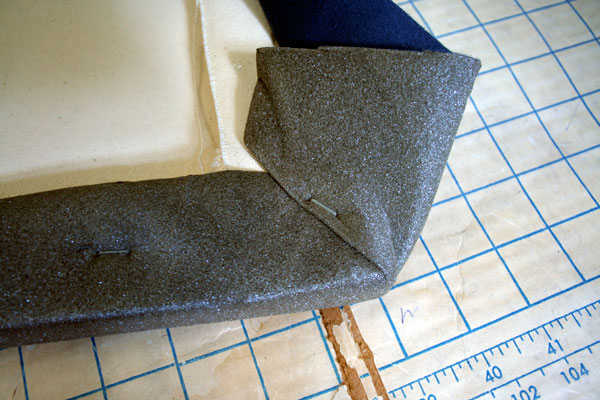
Pull the other side of the fabric down against the frame.
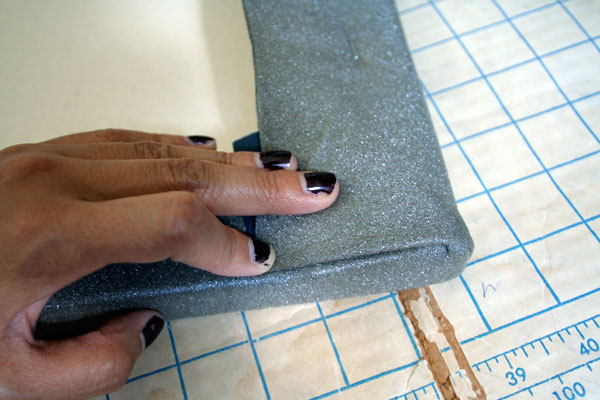
And you should have a neat fold just like this. The fold should be right against the edge of the frame. It should be a nice, neat, and tight fold. It takes a little bit of practice to get it. But once you get it right, you never forget.
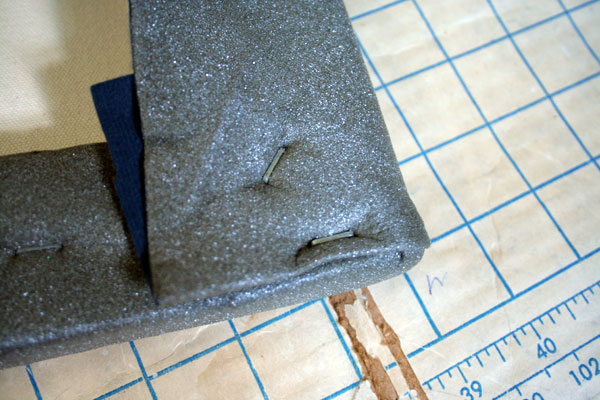
I like to staple it twice. The first staple is against the edge of the frame. And the second staple is cross-wise to hold the corner fold in place.
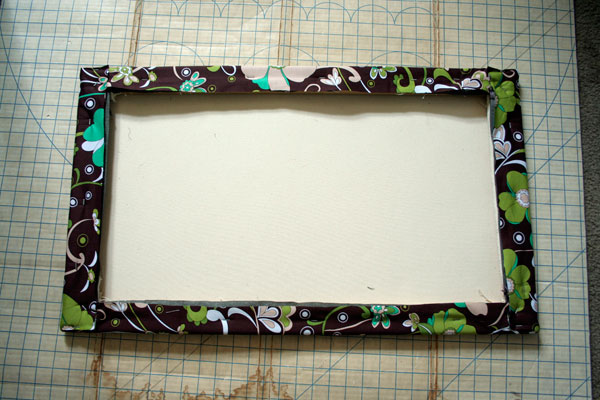
This is what it looks like with all the edges folded. It looks a little messy because the fabric is fluffy, but this is ok because no one is ever going to see this side.
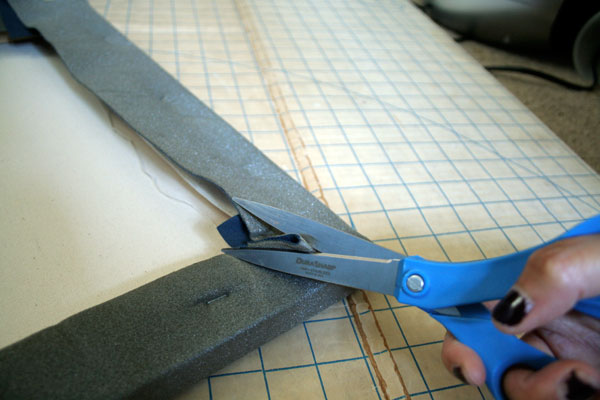
Trim the excess fabric as close to the frame (or stretcher bars) as possible
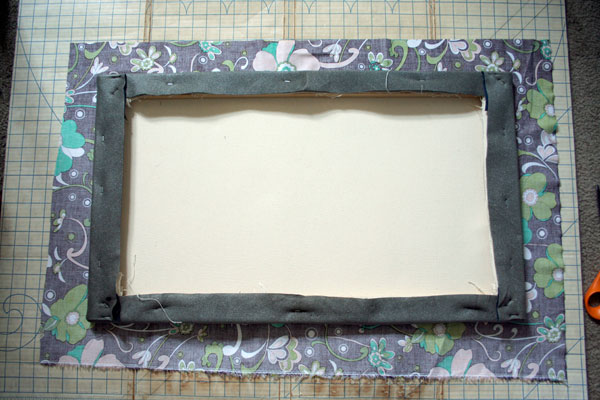
Next, I'm going to repeat the process except I will be using the pretty fabric!
Stapling across the top and sides with even tension.
Folding and stapling neat corners.
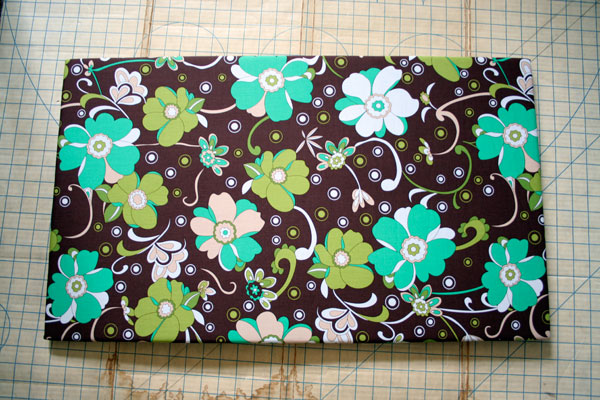
This is what the front of my French Memo Board looks like now.
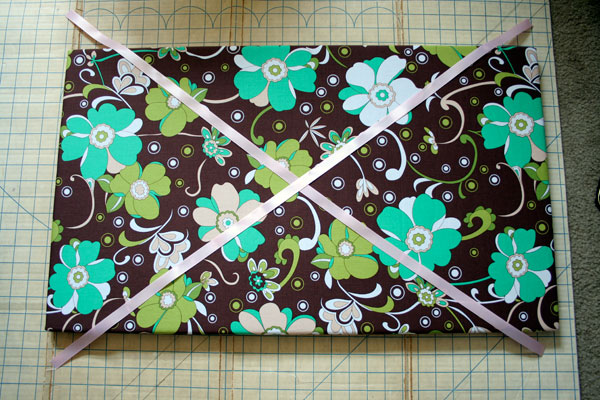
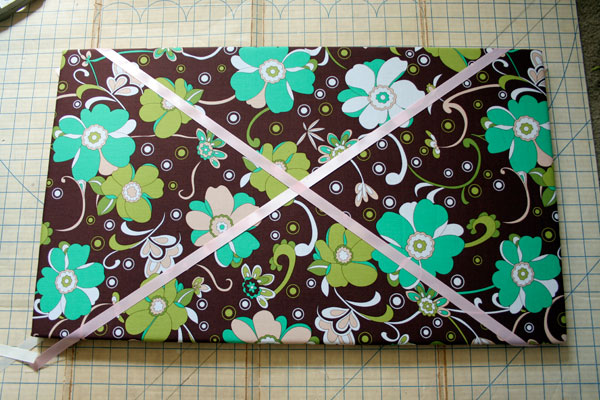
The most difficult part about making a French Memo board is laying out the ribbons. But with a little bit of care, attention and planning, its easy. In order to make it even, I'm laying out a big X on my board. I'm leaving about 3 inches of ribbon on the ends because these will be folded over and stapled later on.
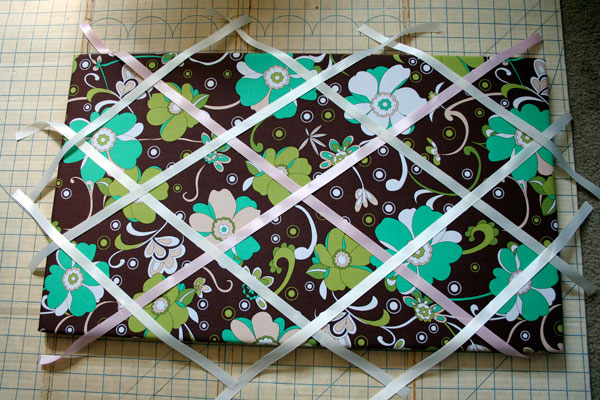
The best way to lay it out is to make parallel lines to the X. There aren't alot of rules here. Nothing is set permanently so you can still move everything around until you are happy with it. Too few ribbons will make it hard to hold anything on your memo boards. Too many ribbons will make it look cluttered. I think I'm happy with this pattern.
I removed all the extra ribbons because I am going to start stapling them. I started with the X again. This foundation makes it easier to place everything else evenly.
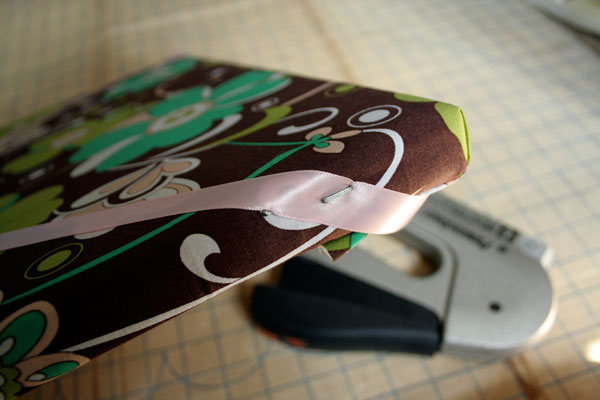
I started with one corner of the X. I find it easier to pin the ribbon first. I'm not sure if you can see it in the photo, but there's a straight pin right at the edge of the pink ribbon. I stapled along the side of my frame. Then stapled the other side of the ribbon nice and tight.

To secure it even further, I stapled it in the back too. I did the same to the other side.

I laid out my ribbons again in parallel lines.
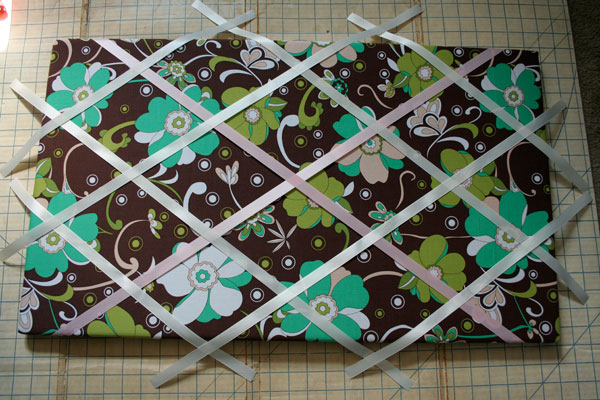
And again for the other ribbons.
Next, weave the ribbons in and out at each cross section. Each ribbon should be up and over. This step is important because these cross-sections will be holding your memos and photos. So double and triple check if you have to. Then staple everything into place. If there is extra ribbon hanging out, feel free to snip the ends to keep it neat.
Now that everything is stapled, its ready to hang!

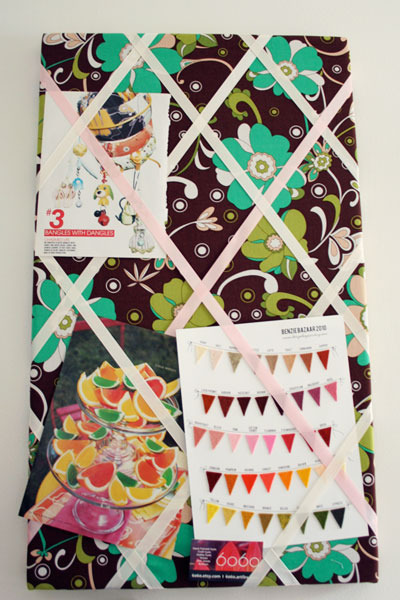
This is what it looks like on my wall. So far on my French Memo board I have some magazine pages cut out, my felt swatches from BenzieBazaar and a business card from 6060. Also in the photo is a hamster clock from my pal Yapi. In the far right is a painting that I bought from artist (and online friend) Kevin Kosmicki
My wall is still a work in progress. I have a lot of things to add to my mood board and a few paintings that I've been wanting to hang. So watch this space. There will be a lot going on!
I hope you enjoyed my tutorial. Let me know if you created your own French Memo board. I'd love to see it!
Best,
Sarah
9 comments:
Great job on the tutorial -and thanks so much for the mention!!
Thanks and no prob :)
Very cool. I keep saying I'm going to be more "arts and crafty" but it never happens. I followed your blog :)
@Alee Yay! Alee! Thanks for reading :) Welcome to the party!
very cool way to reuse that!!
I just linked to this post on my blog!!
http://mygreenbraecottage.blogspot.com/2011/02/ribbon-and-more-memory-boards-linky.html
Hi, just finished my memo board, I got the idea from Rachels office in Friends but your walkthrough helped me to work it through. Mine is quite big and heavy (I used a flakeboard instead of a canvas), how did you do the hanging? I was thinking of using bolts with loops on the wood, to hang it on the wall with nails or screws. I hope it is not going to be to heavy...
I'm working on building a memo board right now and realized that i didn't have a clue how to do the ribbon part. Thank you so much!
best tutorial I have found, thanks!!!
Post a Comment