
It took me a while to get to this point because I had to finish a bunch of other products first. It would have been wasteful to chuck them and start over. I've been using high-end moisturizers and drugstore products and it didn't seem to matter how much money I spent, none of them gave me the results I wanted. Every Winter I still had dry, yucky, scaly, and sometimes crackly-bleeding skin. No thanks.
The most improvement I've seen was when I started using pure shea butter that I found on Amazon. I liked the results but I wasn't entirely happy. It left me feeling super greasy and smelling like an ash tray.
So... back to the drawing board and looking for alternatives.
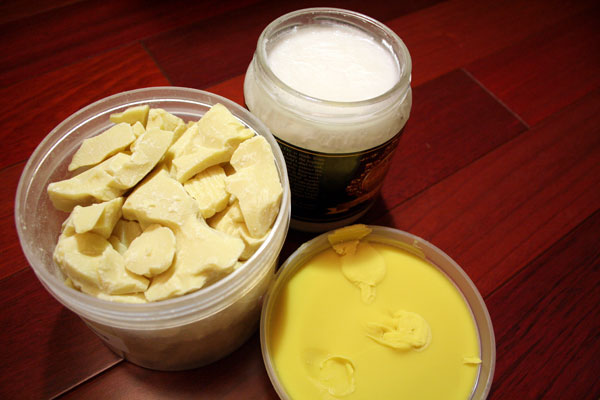
I came across a video on how to combine other natural ingredients to make lotion. It looked super easy and there were only three ingredients. I figured it was worth a try! Pictured on Top: Coconut oil, Left: Raw cocoa butter, Bottom: Pure shea butter
I like all of those things! I also like knowing what's in my lotion and that I can pronounce the ingredients. After all, the skin is the largest organ on the human body and the first line of defense against bacteria and germs. It would make sense to keep it free from harmful chemicals.
The ingredients are expensive at first, but ounce for ounce you'll be getting your money's worth and also getting a high quality, natural product. In total I spent about $25 for all of these ingredients. The containers weigh about a pound each. Its not unusual to pay $25 for a single ounce of product at certain high-end department stores.
Things you need:
1/3 cup coconut oil
1/3 cup raw cocoa butter
2 heaping Tablespoons of shea butter
A pot
A glass or ceramic jar with a lid (I cleaned out an old jam jar. Hooray for recycling!)
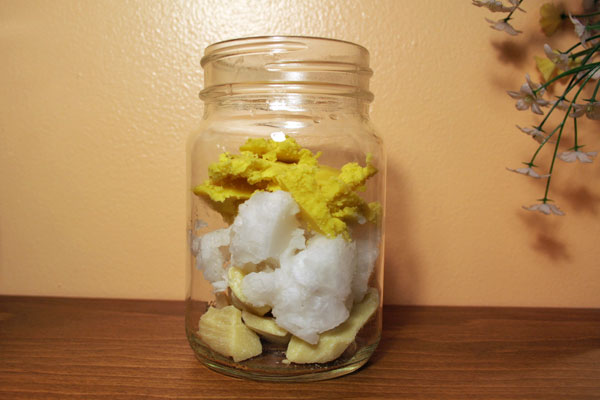
Combine all the oils and butters in a jar. Doesn't this look like a neat science experiment? I'm playing with the states of matter!
Tip: For the cocoa butter, its better to chop up the pieces into smaller bits. I left them in large chunks and they took forever to melt!

Next, heat up some water. It doesn't have to be boiling, just hot. Then place the jar inside the pot like so. You can stir occasionally. This should take about 20 minutes or less.
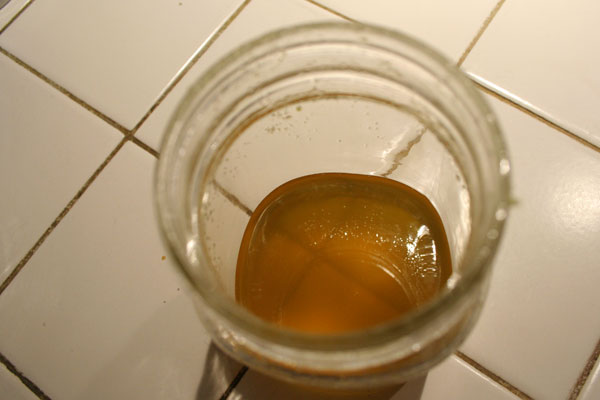
When its melted it will look like this. And it smells just like chocolate! And who doesn't like chocolate?

This is another angle of my jar still in the liquid state. After it gets to room temperature, you can stick it into the refrigerator for about an hour until it turns solid. It makes about a cup of body butter. Scoop a bit and smooth around your hands or wherever!
I've been using it for about a month and I love it so much! I call it my "Science lotion". I don't think I can ever go back to buying commercial products now that I know how to make my own. The blend of coconut oil, cocoa butter, and shea butter is amazing. It smells awesome and melts into my skin and doesn't leave me feeling greasy.
If you're going to make your own, make sure you test a little on your skin first. I know that it would've worked for me because I've used all of these products before, just not together as the same lotion. Its really gentle, I'm pretty sure it can work for everyone.
Here's the video I mentioned on how I learned how to make body butter:
This is Natasha of Radiance Central (her website is really cool too and worth checking out! Its about living a positive life). She uses a dehydrator to make the lotion, but I didn't have one. I found it easy enough to make it on the stove with stuff I had. There are lots of other recipes on how to make your own body butter if you search for it, but I found that this was the easiest for me.
Do any of you have DIY beauty remedies? I'd like to know. After this experiment, I found that its really easy plus its cheaper too. I probably have ingredients to make a year's supply of body butter!
5 comments:
whoooah thats crazy neato!
ah~
that is so cool!
I love this!! I tried some DIY facewash things, (since I hate the idea of putting chemicals and stuff all over my face) but they were a FAIL, so I don't have much to share. ^_^ This looks great... how has it been using it so far?
@binky Yay! You're into chemical-free products too!! I have been using this for almost 2 months now and its going well! I haven't been suffering from "Winter skin"
I haven't tried it on my face yet - I'm scared it might be too heavy for the face. I'll probably test it out after I finish my Burt's Bees face cream :)
If you are looking for skincare that will really show remarkable results, well, look no further! Skin identical means that these
ingredients exist naturally in one’s skin and are recognized by the immune system as endemic to the body .
Post a Comment